
The brake booster check valve acts like a one-way gate, feeding vacuum straight from the engine to your booster while blocking air from leaking back. Get the direction wrong, and you lose that vacuum - leaving you with a rock-hard pedal and weak braking power that could spell trouble.
Always spot the arrow; it points right to the booster. Big end usually hooks to the engine, small end to the booster, but grab your manual to confirm since designs vary by vehicle.
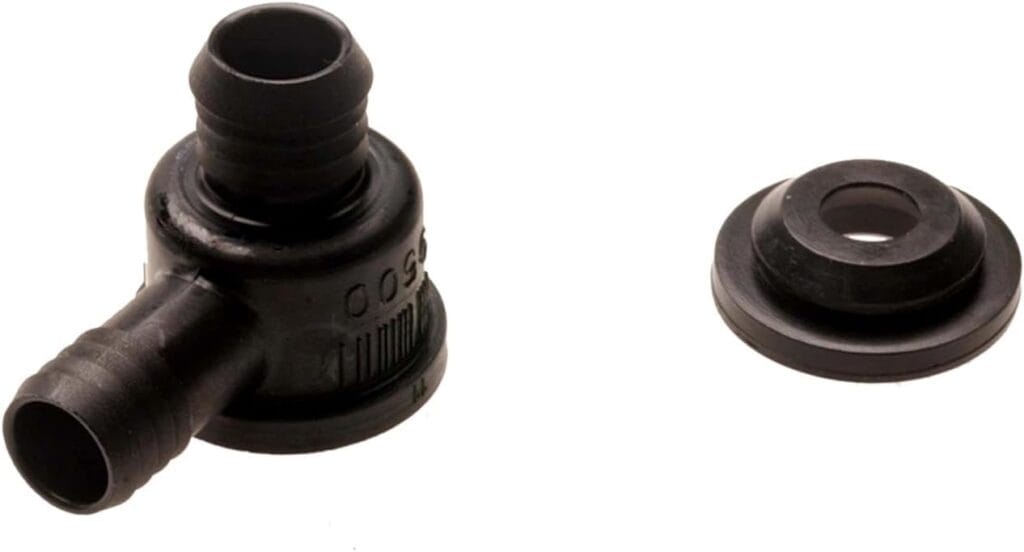
ACDelco 179-1266 kit features a precision-engineered check valve and grommet that maintain consistent vacuum pressure, enhancing brake response and preventing air leaks in GM brake booster systems.
Why the Check Valve Matters
The check valve ensures unidirectional flow, safeguarding engine systems from reverse pressure and contamination. It maintains operational integrity by preventing backflow in fuel, air, or hydraulic circuits. Though compact, it plays a critical role in performance, reliability, and safety.
Spotting the Check Valve
First thing, you need to locate this elusive part. Open your car's hood and find the brake booster. It's usually a big, round, black canister mounted to the firewall on the driver's side.
The check valve is typically a small plastic piece connected to a vacuum near this canister. Let's check to see if it's working.
Testing the Valve: The Easy Way
To test a check valve, apply light air or fluid pressure. It should allow flow one way, block the other. Use a handheld vacuum pump for precision. A faulty valve may hiss, leak, or fail to hold pressure instantly.
Reinstalling the Check Valve
If the direction is off, don't panic. Take a closer look at the valve. Most check valves are marked with arrows or symbols to indicate the correct flow direction.
The arrow should point toward the brake booster. This means the vacuum comes in and stays put. Reattach it to the vacuum carefully. Push it in firmly but gently, ensuring a snug fit.
Signs Your Valve Might Be Failing
A faulty valve doesn't just mess up the booster—it also affects the engine. A hissing sound near the booster? That's a red flag. Hard brakes or stalling during stops? Another hint.
If you notice these signs, don't just check the direction. Check the health of the valve, too. Replacing it is often the best fix, and the good news is that these little parts don't usually cost much.
- Hissing near booster.
- Hard pedal. Needs more force.
- Engine stalls on hard stops.
- Rough idle or check engine light.
Ignore it? Brakes weaken. Parts wear fast.
Why Direction Matters So Much
When the valve is installed correctly, your brake booster holds vacuum pressure like a champ—installed incorrectly? That pressure escapes, leaving you with an unresponsive braking system.
Think of it like a bottle with a cap. If the cap's loose, nothing stays in. Tighten it properly, and it holds everything together. The check valve is your brake booster's cap.
A Word on Replacement Valves
Not all check valves are created equal. If you're replacing yours, go for a reliable one. Stick to your car's manufacturer recommendations or trusted aftermarket brands.
A cheap, flimsy valve might save you a buck today but Cost you peace of mind later. The same rule applies when installing a new valve. Look for the arrow or flow markings.
What Happens When the Valve Fails
The engine might even stall when you brake hard. These minor issues can snowball, and ignoring them might lead to more significant problems in the braking system.
A lousy check valve also means your booster isn't getting the vacuum it needs, which can wear out other parts and turn a minor fix into a costly repair.
Vacuum Hoses Play a Role Too
The check valve doesn't work alone. It relies on the vacuum to carry the pressure. Even a perfectly installed valve won't help if these crack or split.
Inspect the while you're under the hood. Look for any signs of wear—like tiny cracks or soft spots. Replace the damage immediately.
Inspect like this:
- Pop hood. Squeeze hoses.
- Look for cracks. Soft spots.
- Feel for leaks. Replace bad ones now.
Check Valve Placement Isn't Universal
There are different cars and different check valve placements. On some models, it sits right on the booster; on others, it's further down the vacuum line.
This is where your car's manual becomes a lifesaver. It tells you exactly where to find it. If you don't have the manual, a quick search online or at your local parts store can guide you.
Winter Woes and the Check Valve
Cold weather can be harsh on the check valve. Extreme cold sometimes makes the plastic brittle. If you're in a chilly climate, this is something to watch out for.
A frozen or cracked valve can stop your brakes from working properly. In winter, take an extra minute to let your car warm up. This helps protect not just the valve but your entire braking system.
Stay safe:
- Warm car before driving.
- Check valve after freezes.
- Extra caution in chill zones.
The Little Things Matter
Cars are full of tiny, overlooked parts that make a huge difference. The check valve is one of them. Even though it's small, it plays a big role in how safe and smooth your ride feels.
Take a little time to check on it now and then. It's one of those details that pay off in the long run.
Brake booster check valve diagram!

A brake booster check valve is a one-way valve. It lets air out of the brake booster. This creates a vacuum. This vacuum helps you press the brake pedal easily. The valve holds the vacuum, even if the engine stalls. It's a key part of your power brakes.
Conclusion
The brake booster check valve might not be glamorous, but it's essential. Keeping it in the right direction isn't just about smooth braking but safety.
So, next time your brakes feel off or you hear that mysterious hiss, remember to check this little guy. A quick blow test and a careful installation might save you a trip to the mechanic. Plus, there's something satisfying about solving car quirks on your own.
Frequently FAQ
The brake booster check valve is typically located in the vacuum hose connecting the intake manifold to the brake booster. It ensures one-way vacuum flow, preventing loss during engine off. Some modern vehicles integrate it directly into the booster housing for compact design and improved reliability.
Brake booster vacuum leaks cause a hard brake pedal, longer stopping distances, and hissing sounds. A leak may also trigger a rough idle or check engine light due to unmetered air entering the intake. Always inspect hoses and the check valve first.
Yes, you can install a check valve backward. Installing a check valve in reverse obstructs flow, disrupts system pressure, and may trigger diagnostic faults. Directional arrows must align with the intended flow. Misorientation risks pump strain, fluid stagnation, and performance loss—especially in fuel, brake, and coolant subsystems.
To test a brake booster check valve, disconnect it and apply vacuum. It should hold pressure on one side only. If air leaks or vacuum drops, it’s faulty. A good valve ensures consistent brake assist and prevents pedal hardening during stops.
Connect the vacuum pump to the booster’s intake port. Apply 15–20 inHg vacuum and monitor for 60 seconds. A stable reading confirms integrity. Pressure loss indicates diaphragm leakage, internal valve failure, or compromised seals affecting brake assist performance.
The vacuum check valve direction is critical: the arrow on the valve body shows flow direction. It should allow vacuum flow toward the device (e.g., brake booster) but block backflow. Test by blowing through it; air passes only one way. Install horizontally or vertically with flow upward, ensuring the valve functions properly and prevents vacuum loss.
A brake booster check valve is a one-way valve that lets vacuum enter the booster, but blocks air from returning. This maintains vacuum, ensuring brakes have power assist even if engine stops.