

Oil stains on your driveway mean an oil pan leak. This leak comes from bad gaskets, loose bolts, or cracks. Low oil hurts your engine. Fix it fast to save money.
This long guide shows every step. It covers how to find the leak, fix gaskets, fix cracks, pick oil, and stop leaks forever. Use basic tools. Work safe.
How to Spot an Oil Pan Leak First
Check for these signs before you fix:
- Dark oil spots under the car.
- Low oil on the dipstick.
- Burn smell from hot oil on hot parts.
- Oil on the pan or engine bottom.
Quick test: Clean the pan. Run car 10 minutes. Look for new wet spots. Touch oil - it feels slick.
Where leaks hide:
- Gasket edges.
- Bolt holes.
- Drain plug.
- Cracks on pan side or bottom.
What Causes Oil Pan Leaks

Leaks start from:
- Old gasket gets hard and cracks.
- Bolts loosen from road bumps.
- Pan hits rocks or curbs.
- Wrong oil eats seals.
- Over-tighten bolts - warps pan.
- Rust on old cars.
Fix cause to stop repeat leaks.
Clean Everything Up
Alright, before we slap on a new gasket, we have to clean things up. I know - it’s tempting to rush, but trust me, this part is super important. If there’s even a little bit of oil or dirt left, the new gasket won’t seal right, and boom - you’ve got another leak. Nobody wants that.
So here’s what I do. I grab a good degreaser and a clean rag, then go to town on the oil pan and the engine surface. If there’s an old gasket stuck in there (which there usually is), I carefully scrape it off with a plastic scraper. Not metal - because scratching the surface will just cause more problems later.
Once everything is spotless and dry, I double-check it. No oil. No dirt. No leftover gasket bits. Just clean, smooth metal. It might seem like a small step, but trust me, doing this right saves a ton of headaches down the road!
Tools and Parts List
Get these before start:
- Car jack and stands.
- Socket set (metric or SAE for your car).
- Torque wrench (key for bolts).
- Plastic scraper.
- Brake clean spray.
- Rags.
- New gasket - match your engine model.
- New oil - right type from manual.
- New oil filter.
- Drain pan.
- For cracks: JB Weld high-heat or epoxy.
- RTV sealant (if manual says use).
Cost estimate:
| Part | Price |
|---|---|
| Gasket | $10-30 |
| Oil (5 quarts) | $20-50 |
| Filter | $5-15 |
| Pan (new) | $50-200 |
| Tools (if buy) | $50-150 |
Total DIY fix: Under $100 most times.
Safety rules:
- Cool engine off.
- Chock wheels.
- Use jack stands.
- Eye protection.
- Gloves.
Use a Quality Gasket
Let’s talk about the most important thing - the gasket. This little guy is the only thing stopping oil from leaking all over the place, so we have to get it right. And let me tell you, I’ve made the mistake of going cheap before… big regret. A bad gasket means you’ll be crawling back under the car fixing the same leak all over again. Nope, not doing that.
So, here’s what I do. I always get a high-quality gasket that’s made for my engine. No guessing, no cheap knock-offs. And about gasket sealant? Some people swear by it, but honestly, it’s only needed if the manufacturer says so. Too much sealant can cause leaks instead of stopping them. Learned that one the hard way.
At the end of the day, spending a little extra on a solid gasket is so worth it. Do it right the first time, and you won’t have to deal with oil dripping everywhere again.
Full Step-by-Step: Gasket Leak Fix

Gaskets fail most. Heat and age kill them. Replace like this.
Step 1: Drain Oil
- Park flat.
- Warm engine 5 minutes.
- Put drain pan under.
- Remove drain plug with wrench.
- Let oil run out 10 minutes.
- Check plug washer—replace if bad.
- Wipe plug clean. Set aside.
Step 2: Take Off Oil Pan
- Jack car up.
- Put stands under frame.
- Remove skid plate if there.
- Loosen bolts criss-cross - from outside in.
- Break gasket seal with plastic pry tool.
- Tap pan with rubber hammer if stuck.
- Pull pan down slow. Tip to drain rest oil.
Tip: Some pans have pickup tube. Cut zip tie or unbolt if needed.
Step 3: Clean All Parts
- Scrape old gasket off pan and block.
- Use plastic—no metal scratches.
- Spray brake cleaner on both sides.
- Wipe dry with clean rag.
- Check for dents, cracks, bad threads.
- Fix threads with easy-out tool if stripped.
Why clean? Dirt makes new gasket leak.
Step 4: Put New Gasket On
- Dry fit gasket first - no twists.
- Put gasket on pan tabs.
- Add RTV dots only if manual says.
- No sealant? Skip it.
- Put pan up to block.
- Start all bolts by hand.
Step 5: Tighten Bolts Right
- Use torque wrench.
- Criss-cross pattern: Center out.
- Tighten in 3 steps: Hand, half torque, full torque.
- Specs by engine:Engine TypeTorque4-cylinder12-18 ft-lbsV615-22 ft-lbsV818-25 ft-lbs
- Check manual for your car.
Step 6: Finish and Test
- Put drain plug in - torque to spec.
- Fill oil slow. Check level.
- Put new filter on.
- Lower car.
- Run engine 2 minutes. Shut off.
- Wait 5 minutes. Check oil spots.
- Drive short test. Check again.
Tighten Bolts Evenly
This part might seem simple, but trust me - it matters. I used to think, “Just tighten them as much as possible, and we’re good, right?” Nope. That’s actually how leaks start! If you crank down too hard, the gasket gets squished and won’t seal right. If you don’t tighten enough, well… oil is gonna find a way out.
So, here’s what I do now. I tighten the bolts little by little in a crisscross pattern - kind of like putting on a tire. This keeps the pressure nice and even so the gasket seals the way it’s supposed to. And if you have a torque wrench? Even better! Just check your car’s manual for the right tightness, and boom - no leaks.
I know it’s tempting to just get it done fast, but trust me on this one. Take your time, tighten them evenly, and you won’t have to deal with oil dripping all over the place later. I learned the hard way - now you don’t have to!
Sealing a Cracked Pan
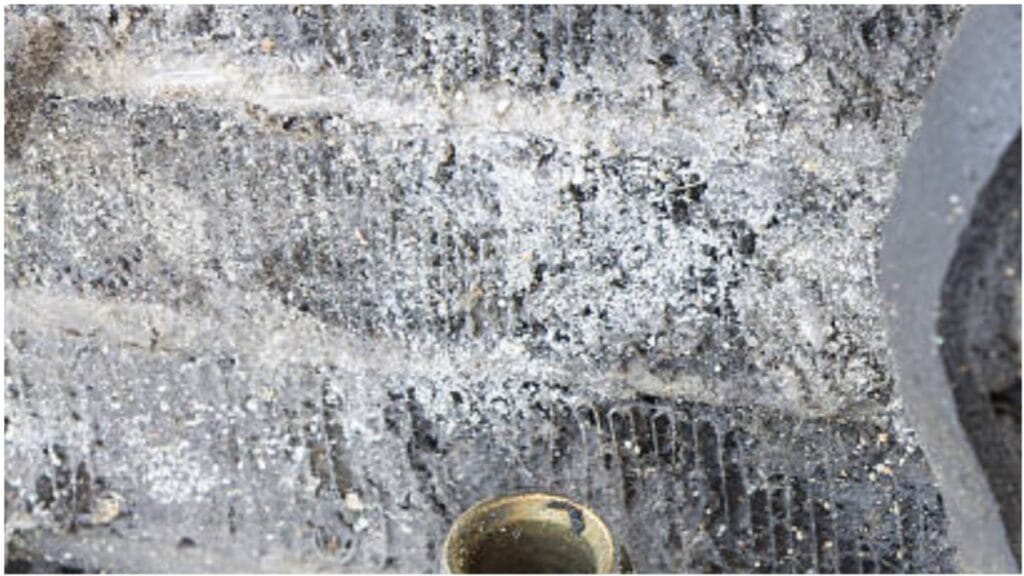
So, here's the deal with a cracked oil pan - it’s not as easy as just swapping out a gasket, but don’t worry, it’s fixable. First, I always clean the area around the crack well. I mean, you want to get rid of any dirt, old oil, or rust so the sealant can stick.
Once that’s done, I grab an epoxy or some oil pan sealant made for high temperatures. Just be sure to cover the whole crack, you know? You don't want to miss any spots.
Now, the hardest part is waiting for the stuff to set! I make sure to follow the instructions, which usually means letting it sit for a while so it dries properly. You want to make sure it’s fully cured before adding any oil back in or starting the car up.
After the waiting game, I refill the oil and check the spot to see if it's holding up. If everything looks dry and good, then the crack is sealed, and I’m good to go.
But hey, if the crack’s pretty big or if the sealant just doesn’t seem to be working, it might be time to think about getting a new oil pan. But for smaller cracks, this method usually works great and keeps my engine happy.
Best Oil and Filter Choices
Bad oil kills seals fast. Pick right one.
Check manual for:
- Viscosity (like 5W-30).
- API rating (SN or higher).
- Synthetic or not.
Oil types table:
| Type | Good For | Change Miles | Brands |
|---|---|---|---|
| Regular | Old cars | 3,000-5,000 | Pennzoil, Valvoline |
| Blend | Most cars | 5,000-7,500 | Mobil, Castrol |
| Full Synthetic | New/hot engines | 7,500-10,000 | Amsoil, Royal Purple |
Filter tips:
- OEM best.
- Wix or Fram Tough.
- Prime with oil before install.
Change every time you fix leak.
Use the Right Oil
Okay, let me tell you - using the right oil is super important, even if it sounds like a no-brainer. It’s one of those things I didn’t always pay attention to, but trust me, once I did, everything ran a lot smoother. I always check the car’s manual to see what oil it needs.
That’s the best place to start because using the wrong oil can lead to a lot of problems, like oil breaking down too quickly or clogging up parts of the engine. Not good!
When I know what oil my car needs, I just stick with it. It’s kind of like choosing the right fuel for your car, you know? I make sure to use the right viscosity and pick between synthetic or regular oil depending on what the car recommends.
Doing this just makes everything run better and, honestly, saves me a lot of stress. When the oil’s right, the engine stays cooler, the pressure’s better, and there’s less chance of oil leaks.
So yeah, using the right oil is a simple thing, but it makes a huge difference. It helps prevent leaks and keeps everything working as it should. I also make sure to change it on time. That way, the engine stays happy and the oil pan stays dry. Pretty easy, right?
Maintain the Gasket

So you’ve got a brand-new gasket in there, and everything’s sealed up nice and tight. But here’s the thing - a gasket won’t last forever if you don’t take care of it. And trust me, I’ve learned that the hard way. A little bit of maintenance now can save you from another leak later.
First, keep an eye on your oil levels. If you notice oil disappearing faster than usual, your gasket might be starting to go bad. Also, check under your car now and then - tiny drips can turn into big problems if you ignore them. Catching a small leak early is way easier than fixing a huge mess later.
Another big one? Regular oil changes. Old, dirty oil can break down seals over time, making them weak. I always stick to the recommended oil change schedule, and I use good-quality oil. It makes a difference!
Bottom line? If you keep an eye on things and stay on top of maintenance, your gasket will last a long time. And that means no crawling under the car again anytime soon!
Conclusion
Fixing an oil pan leak might sound like a big deal, but honestly, it’s not that bad - if you do it right. I’ve made mistakes before, rushing through it or using cheap parts, and guess what? The leak came right back. So now, I take my time. I clean everything, use a good gasket, and tighten those bolts evenly. That way, I know I won’t be crawling back under the car anytime soon.
But here’s the thing - fixing the leak is just one part of the job. Keeping it from coming back? That’s where the real work happens. I always keep an eye on my oil levels, check under the car for drips, and stick to regular oil changes. I’ve learned that old, dirty oil can wear out seals faster, so I don’t take any chances. A little maintenance now saves a ton of trouble later.
At the end of the day, I’d rather spend a little extra time doing it right than dealing with another leak down the road. So, take it from me - be patient, use quality parts, and check on your oil every once in a while. Your car (and your sanity) will thank you!
Common FAQ's
Heat, age, and road vibrations make gaskets hard and crack. Loose bolts warp the seal. Over-tightening squishes it. Bad oil eats rubber. Impacts dent the pan. Dirt skips cause poor seal. Fix early to save engine.
Oil pan gasket replacement: Drain oil, remove pan bolts criss-cross, scrape old gasket clean. Install new gasket - no excess sealant. Torque bolts even to spec (15-25 ft-lbs). Refill oil, test run. Clean surfaces key - skips cause leaks. DIY in 2 hours.
Oil pan gasket replacement cost BMW: Parts $30-100, labor $400-1200 due to tight engines. Total $500-1500 by model - 3 Series $500-900, X5 $700-1300, M cars up to $1500. DIY cuts to $100 parts. Dealer quotes hit $2000+.

Gerry is a certified automotive expert and founder of AutomotiveAH.com, specializing in vehicle maintenance, diagnostics, and engine systems, delivering trusted, research – driven automotive guidance.