

We’ve all been there - pulling into the driveway and spotting those pesky oil drops under the car. An oil pan gasket leak can turn a small drip into major engine trouble fast.
This guide breaks down why it happens, how to diagnose it quick, and step-by-step fixes - from simple tweaks to full DIY replacements. No more guessing. Let’s get your ride leak-free.
Why Oil Pan Gaskets Leak (Common Causes)
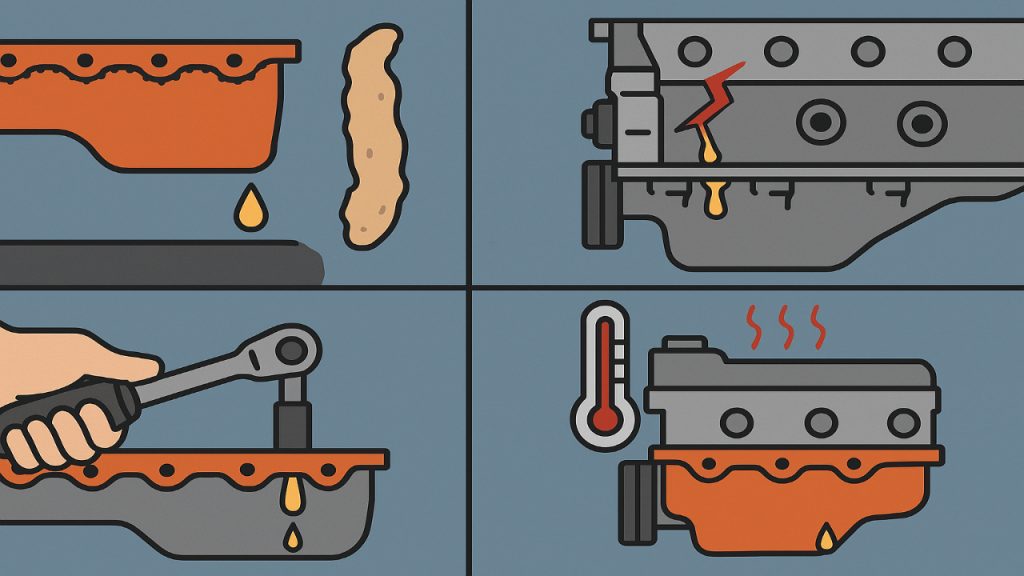
That gasket seals the oil pan to your engine block, keeping precious oil inside. When it fails, oil seeps out. Here are the top culprits:
- Age and heat wear: Constant engine heat bakes the rubber, causing cracks over 100,000 miles.
- Bolt issues: Loose bolts let it shift; over-tightened ones crush it flat.
- Vibration stress: Bumpy roads shake it loose faster.
- Overfilled oil: Extra pressure forces oil past weak spots.
- Bad installs: Dirty surfaces or cheap gaskets fail early.
- Temperature swings: Hot-cold cycles make it brittle.
- Road salt or wrong oil: Chemicals and bad fluids eat seals.
Spot the cause early to prevent repeats. Check your service history for clues.
Signs Your Oil Pan Gasket Is Leaking
Don’t wait for disaster. Watch for these red flags:
- Oil puddles under the front-middle of your car after parking.
- Burning oil smell inside the cabin (oil hits exhaust).
- Low oil levels on the dipstick - top off often.
- Wet oil on the engine block or visible drips from the pan.
- Orange/brown spots on cardboard overnight test.
Rev the engine - leaks grow with pressure. Ignore small ones, and they turn catastrophic.
Tools and Materials You’ll Need
DIY fixes stay under $100. Stock up:
- Socket set and torque wrench (key for even tightening).
- Gasket scraper and brake cleaner.
- New gasket (model-specific) + RTV sealant.
- Drain pan, jack stands, rags, gloves.
- Penetrating oil for rusty bolts.
- Thread locker and rubber mallet.
Pro tip: Quality parts last. Skip bargain-bin gaskets.
Step-by-Step DIY Oil Pan Gasket Fix

Ready to tackle it? Park flat, work safe. Takes 2-4 hours.
- Step 1: Prep and Drain: Jack the front on stands. Drain oil via plug into pan. Remove obstacles - exhaust, crossmember, or subframe drops on some trucks.
- Step 2: Drop the Pan: Loosen bolts crisscross to avoid warping. Pry gently - no gouges. Scrape old gasket completely. Clean surfaces spotless with scraper and cleaner.
- Step 3: Install New Gasket: Dry-fit first. Add thin RTV to corners if instructions say. Align bolt holes perfect - no glue unless specified.
- Step 4: Reattach Pan: Hand-tighten bolts. Torque from center out in star pattern (e.g., 80 in-lbs - check manual). No over-tightening!
- Step 5: Test and Finish: Reinstall parts. Add new filter and oil. Run engine 5 minutes. Check for drips. Test drive, recheck at 50 miles.
Tight spots? Some engines need engine hoist - go pro then.
Quick Fixes When You’re in a Pinch
No time for teardown? Try these temps:
- Oil stop leak additives: Pour in BlueDevil, drive - it swells seals. $20, works on minor leaks.
- Spray sealants: Clean underside, hit with Permatex. Quick coat from below. Under $15.
Best for old cars or until full repair. Not for gushers.
Prevention Tips to Keep Leaks Away
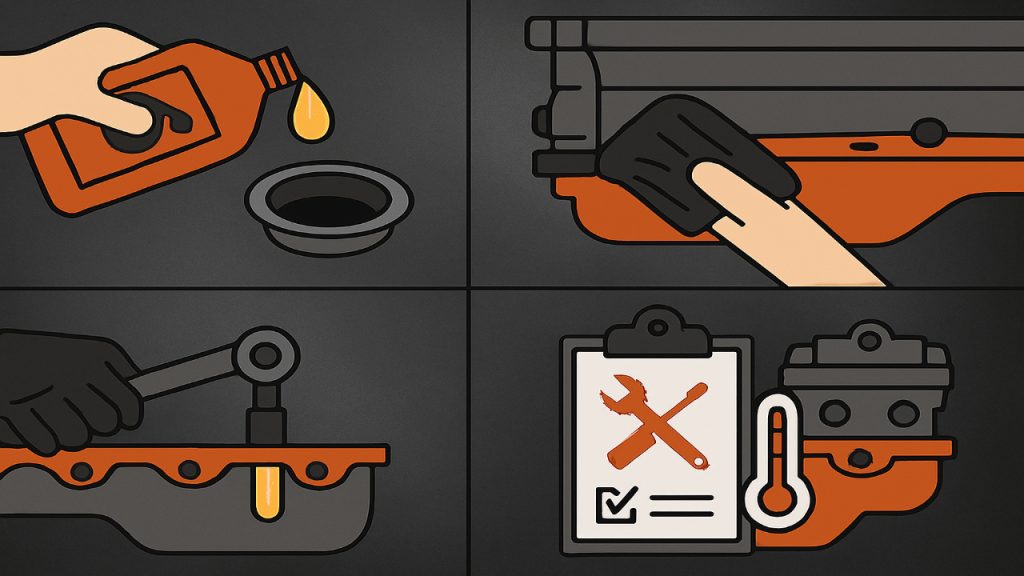
Stay ahead:
- Oil changes every 5,000 miles with spec fluid.
- Torque bolts to manual specs - never guess.
- Yearly pan inspections: Wipe, mark, monitor.
- Fix drips early. Park indoors in salty areas.
- Tighten loose heat shields. Use quality gaskets.
These habits add years to your seals.
Replace the Gasket
So the bolts didn’t fix the leak? No worries - that just means the gasket itself is the problem. Time to roll up our sleeves and replace it. It’s a little messy but doable. We’ve done this before, and trust me, once you get through it, you’ll feel like a pro.
First things first, we need to drain the oil. Otherwise, the second you remove the oil pan, you’re gonna have a huge mess on your hands. Grab a drain pan, remove the oil drain plug, and let all that oil flow out. Once that’s done, put the drain plug back in so we don’t forget later.
Now, it’s time to remove the oil pan. Grab a wrench and start loosening the bolts holding it in place. Go slow and work your way around evenly. Once all the bolts are out, the pan might still be stuck - don’t yank on it! Gently tap it with a rubber mallet or use a plastic scraper to break the seal. If you pry too hard, you could bend the pan, and that’s a whole other problem.
With the pan off, we finally get a good look at the old gasket. If it’s brittle, cracked, or covered in gunk, that’s your leak right there. Carefully peel it off, and now comes the most important step - cleaning. Any leftover bits of gasket or dirt on the surface will keep the new one from sealing properly. Grab a gasket scraper or some brake cleaner and make sure everything is spotless.
Now we’re ready to install the new gasket. Some gaskets need sealant, some don’t - check the instructions that came with yours. If it does need sealant, don’t go overboard - a thin, even layer is all you need. Once the gasket is in place, line up the oil pan and start putting the bolts back in.
Don’t tighten them all at once! Start each one by hand, then go around in a crisscross pattern to tighten them evenly. This helps the gasket seal properly without warping the pan.
Alright, we’re almost done! Now, refill the engine with oil and double-check everything. Start the car and let it run for a few minutes. Look underneath - no drips? No leaks? Boom, you nailed it! If you do see oil seeping out, don’t panic. Just check the bolts and make sure everything is seated properly.
And that’s it! Replacing an oil pan gasket might seem like a big job, but once you do it, you’ll see it’s not that bad. Just take your time, follow the steps, and before you know it, your car will be leak-free and running like a champ!
Conclusion
An oil pan gasket leak might seem like a small problem, but it can lead to bigger issues if ignored. Whether it’s from wear and tear, bad installation, or too much oil pressure, fixing it early will save you time and money. Keep an eye on your oil levels, and if you spot a leak, don’t wait too long to take action.
Common FAQ's
Quick fix is simple. Check for drips under front-middle. Tighten bolts snug - don't crush gasket. Clean area. Spray Permatex sealant below. Or add BlueDevil stop-leak to oil. It swells seals fast. Drive easy. Holds weeks till full repair.
Go BlueDevil. Pour one bottle in oil. Drive normal - it swells seals fast. Permatex spray works too. Clean underside first, coat gasket. Stops drips quick. Holds months on small leaks. Cheap fix till gasket swap. Pick BlueDevil for best results.
Age dries it out. Heat cracks rubber. Loose bolts shift seal. Over-tight crush it flat. Vibration shakes loose. Bad install skips clean. Overfilled oil adds pressure. Road salt eats edges. Wrong oil hurts seals. Fix early - beats engine damage.

Gerry is a certified automotive expert and founder of AutomotiveAH.com, specializing in vehicle maintenance, diagnostics, and engine systems, delivering trusted, research – driven automotive guidance.